No edit summary Tag: rte-source |
|||
| (37 intermediate revisions by the same user not shown) | |||
| Line 1: | Line 1: | ||
| − | __NoToC__ |
||
[[File: bear_baiting_1.png | right | 300px]] |
[[File: bear_baiting_1.png | right | 300px]] |
||
| − | + | Baiting is used to attract a large number of animals to an area over a long period of time. In order to bait the player needs to acquire a bait container (persistent item) and fill it with bait (consumable item). |
|
| − | == |
+ | == Simplification (Baiting 2.0) == |
| + | The baiting system Was overhauled on March 30, 2017 to simplify the process. A developers note:<br> |
||
| − | Unlike other lures, the effects of bait continue to evolve even when the player is not playing the game. This means that as long as there is bait in the container it becomes more and more powerful no matter if the player is in the game, watching TV or out bagging real life prey. |
||
| + | ''One of the objectives when setting out to rework the baiting system was to simplify it. Not only to make the experience for the players more consistent and hopefully more enjoyable, but to make the system easier to debug, maintain, and further develop in the future. To simplify the system, some important decisions were made which have changed how baiting works now. We understand that some players may have preferred a more complex system which had a lot of unknown variables resulting in unpredictable behavior, but it is our hope that the new system will offer better value without removing all of the challenge from baiting.'' |
||
| − | |||
| ⚫ | |||
| ⚫ | |||
== Attraction == |
== Attraction == |
||
| + | Attraction used to rely on the location of the container and would slowly grow or lower over time when food was available or depleted. The new system no longer has any concept of attraction, formerly a number between 0 and 100. A feeder now has a status, and this can either be “active”, “inactive”, or “penalty”. |
||
| − | Attraction is a measurement for how popular a bait container is to the animals. A newly placed bait container will always have an attraction value of zero. If the container is placed in an area with a large population of the according animal, the attraction will start to grow. Attraction affects both the amount of animals that spawn in the area around the container as well as the size of the attraction radius around it. The higher the attraction, the more animals you will find in the area around the container. |
||
| + | * Active: The feeder contains bait and is capable of baiting species. |
||
| + | * Inactive: The feeder may or may not contain bait but is incapable of baiting species. |
||
| + | * Penalty: The feeder is currently disabled because a baited animal was shot at the site. |
||
| + | [[File:feeder_status.jpg]] |
||
| − | Bait is generally less effective than other lures (scents, callers) when attractiveness is low, but much more effective when attractiveness is high. With that said even a container with zero attractiveness can occasionally attract animals as long as it is filled with bait. |
||
| ⚫ | |||
| − | Attraction continues to grow until the container either runs out of bait or peak attractiveness is reached. Once a container runs out of bait, attractiveness slowly begins to decrease, and unless more bait is added, it eventually drops to zero. |
||
| ⚫ | |||
| ⚫ | |||
| − | '''Location Attractiveness'''<br /> |
||
| + | * Without food, the container will not attract animals. |
||
| − | * The location where a bait container is placed can have a dramatic effect on its effectiveness. |
||
| ⚫ | |||
| − | * Location Attractiveness affects both the rate at which attractiveness grows as well as Peak Attractiveness. |
||
| ⚫ | |||
| − | * The maximum attractiveness that a container can reach is 100%. |
||
| − | * You can check the attractiveness of your container on the map where you start your hunts. |
||
| − | * In a good spot where the attractiveness will grow to 100%, the growth per day is 15%. |
||
| − | ** Tip: After placing your feeder and filling it with food, note the time. Check the attractiveness after 24 hours. If it is a lot below 15%, move the container. It is not a good spot. |
||
| ⚫ | |||
| − | '''Peak Attractiveness'''<br /> |
||
| + | When you place a new feeder in a reserve and add some bait to it, the initial status of the feeder will be inactive, for a period of 4 hours (real time). During this time, the feeder will not attract any animals. After the 4 hour warm-up period, the status of the feeder will change to active and two things will happen. The bait will start to deplete, and the feeder will be capable of attracting animals. |
||
| − | * Peak Attractiveness is the maximum attraction level that a bait container can reach at that particular location. |
||
| − | * You will know that your feeder has reached Peak Attractiveness once the attractiveness no longer grows despite the container holding bait. |
||
| − | * Reaching Peak Attractiveness from a newly placed container can take up to a week in a good area. |
||
| − | * To check the current level of attractiveness of your container, open the launcher and click Hunt Now. Move the mouse over the feeder icon on the map or in the left navigation where the lodges, tents and feeders are listed. |
||
| + | If you let a feeder run out of bait, the next time you add bait the 4 hour warm-up period will restart. This can be avoided by having some bait in the feeder at all times. Topping up a feeder which already contains bait does not restart the warm-up period. A feeder with any bait in it will always remain active and capable of attracting animals. |
||
| − | [[file:FeederAttractiveness.png | link=]] |
||
| − | + | == Shooting Penalty == |
|
| + | If you shoot a baited animal near a feeder, the attraction range is reduced to minimum. The range then slowly expands until it reaches its maximum again. This takes 30 minutes. During this time the feeder is still fully attracting animals within the range. The status of the feeder will change to "Penalty". |
||
| − | * Shooting an animal in the area around a bait container reduces the container's attraction for a time. |
||
| − | * The shooting penalty is a drop of 75 points of the attractiveness. |
||
| − | * The attraction recovery rate after taking a penalty is 35% per day. |
||
| − | * The shooting penalty only applies if the animal that was shot had been attracted by the container. |
||
| − | ** For instance, shooting a [[Black Bear]] near a Bear Bait Barrel will cause attractiveness to drop, whereas shooting a [[Moose]] in the same area will not. |
||
| − | ** Chasing animals away from the container, i.e. outside the attraction radius, and then shoot it there will also cause an attractiveness penalty. This was added as an exploit prevention. |
||
| − | ** If the baited animal was spooked by another (spooked) animal and it moves outside the attraction radius, it can be shot without taking the penalty. |
||
| ⚫ | |||
| − | * Shooting at any other species will never cause a penalty, no matter where it is. |
||
| ⚫ | |||
| − | '''Food / Bait''' |
||
| ⚫ | |||
| − | * In an area with perfect attraction, food consumption is 10 units per real day. |
||
| ⚫ | |||
| ⚫ | |||
| + | The shooting penalty only applies if the animal that was shot had been attracted by the container. For instance, shooting a [[Black Bear]] near a Bear Bait Barrel will trigger the penalty, whereas shooting a [[Moose]] in the same area will not. Also if that bear is no longer attracted and walks away, shooting it will not result in a penalty. |
||
| − | == Moving Containers == |
||
| ⚫ | |||
| + | == Choosing Locations == |
||
| − | If the container contains bait when picked up, the bait remains stored in it until the container is once again placed in the world. Bait does not decrease when the feeder is not placed anywhere on a map. |
||
| + | The location of your feeder matters. Choose an area where you find many animals of the species you intend to bait. The feeder will attract animals like any other lure. The more animals there are in an area, the better your chances and the bigger your number of baited animals near the baiting station. If you attempt to place a feeder in a location where the corresponding animal does not exist, you will not be able to and will receive an according message. |
||
| + | Some locations will generate better results than others. This is when it becomes important to discuss locations with hunting buddies and fellow community members. If you place a feeder in the same location as your hunting buddy, you should see pretty similar results in most hunts. There will always be variations in activity due to the random nature of the spawning system, but in general results should be predictable. |
||
| ⚫ | |||
| − | * minimal distance between two bear bait barrels: 500m |
||
| − | * minimal distance between lodges/campsites/tents and bear bait barrels: 400m |
||
| − | * barrel attraction radius at attraction level 10: ~150m |
||
| − | * barrel attraction radius at attraction level 100: 250m |
||
| − | * shooting penalty radius: 100m-250m, depending on the attractiveness |
||
| − | * shooting penalty: -75 attractiveness |
||
| − | * max growing rate: 15 per day |
||
| − | * max growing rate to recover from penalty: 35 per day |
||
| ⚫ | |||
| + | [[File:baited_hogs.jpg]] |
||
| ⚫ | |||
| − | Use the following equipment to bait animals. |
||
| − | + | == Moving Containers == |
|
| ⚫ | Bait containers can be moved during a hunt using the environment interaction menu (default key: E). If the container contains bait when picked up, the bait remains stored in it until the container is once again placed in the world. Bait does not decrease when the feeder is not placed anywhere on a map. |
||
| + | == Reserve Limits == |
||
| ⚫ | |||
| + | A maximum of 4 bait sites can be placed in each reserve. This includes all types; goat mineral feeders, bear bait barrels and hog feeders. For example, you can have 2 goat mineral feeders and 2 hog feeders in [[Bushrangers Run]], but not more of any type. |
||
| ⚫ | |||
{| class="wikitable" style="width:80%; text-align:center;" |
{| class="wikitable" style="width:80%; text-align:center;" |
||
| + | ! colspan="2" | Feeder |
||
| − | !Name |
||
| + | ! colspan="2" | Bait |
||
| − | !Icon |
||
| ⚫ | |||
| − | !Compatible Bait |
||
| − | !Max Bait Amount |
||
| − | !Reserve Limit |
||
| − | !Own Limit |
||
|- |
|- |
||
| − | | |
+ | | width="200" | Bear Bait<br>Barrel |
| − | | |
+ | | width="100" | [[Image:large_equipment_bait_barrel_256.png|x100px]] |
| − | | |
+ | | width="200" | Bear Bait |
| ⚫ | |||
| − | | style="width:15%;" | 50 |
||
| ⚫ | |||
| − | | style="width:15%;" | 3 |
||
| − | | style="width:15%;" | 15 |
||
|- |
|- |
||
| − | + | | Hog Feeder |
|
| − | + | | [[Image:large_equipment_hog_feeder.png|x100px]] |
|
| − | + | | Hog Bait |
|
| ⚫ | |||
| − | | style="width:15%;" | 50 |
||
| ⚫ | |||
| − | | style="width:15%;" | 3 |
||
| ⚫ | |||
| − | | style="width:15%;" | 15 |
||
| + | | Goat Mineral Feeder |
||
| + | | [[Image:large_equipment_goat_feeder.png|x100px]] |
||
| + | | Mineral Block |
||
| + | | [[Image:mineral_block.png|x100px]] |
||
| + | | [[File:feral_goat_male_brown.png | 80px | link=Feral Goat]] |
||
|} |
|} |
||
| ⚫ | |||
[http://www.thehunter.com/store/?category=8&type=31 Buy equipment] or check out the [http://www.thehunter.com/store/?category=7 bundles]. |
[http://www.thehunter.com/store/?category=8&type=31 Buy equipment] or check out the [http://www.thehunter.com/store/?category=7 bundles]. |
||
| − | === Bait === |
||
Bait can be bought in the store in Lures - Bait section, or in the Bundles section as a package with bait containers. |
Bait can be bought in the store in Lures - Bait section, or in the Bundles section as a package with bait containers. |
||
| ⚫ | |||
| + | == Numbers and Facts == |
||
| − | {| class="wikitable" style="width:53.34%; text-align:center;" |
||
| + | * There is a 4 hours wait time after adding feed before a feeder becomes active. |
||
| − | !Name |
||
| + | * A 30 minutes penalty applies when a baited animal is shot at. |
||
| − | !Icon |
||
| + | * The maximum attraction radius is 150m for [[Feral Goat]]s and 250m for hogs and bears. |
||
| ⚫ | |||
| + | * The minimal possible distance of a feeder to lodges/campsites/[[Happy Camper Tent | tents]] is 400m, to other feeders 500m. |
||
| − | !Units |
||
| ⚫ | |||
| ⚫ | |||
| + | * Feeder warm-up, food depletion and penalty recovery all happens whether you play the game or not. |
||
| − | | style="width:25%;" | Bear Bait |
||
| + | * There is a maximum of 4 feeders total that can be placed in a reserve. |
||
| ⚫ | |||
| + | * At the start of the game additional animals spawn around the feeder that contains feed. |
||
| ⚫ | |||
| + | * Feeders cannot be placed if no attracted species exist in the reserve. |
||
| − | | style="width:25%;" | 50 |
||
| + | * Moving a feeder causes another 4 hour wait time until it becomes active again. |
||
| ⚫ | |||
| + | * When moving a feeder during a hunting session, it will spook the surrounding animals when removing and placing, however will stay active after being placed again. |
||
| − | | style="width:25%;" | Hog Bait |
||
| + | ** Animals will again come to the feeder within the same session. |
||
| ⚫ | |||
| + | ** The attraction ends only after leaving the game. |
||
| ⚫ | |||
| + | ** It will then again take the usual 4 hours warm-up. |
||
| − | | style="width:25%;" | 50 |
||
| − | |} |
||
| + | == Management from the Website == |
||
| ⚫ | |||
| + | |||
| + | [[File:feeder_mgmt.png]] |
||
| + | |||
| + | You can access the Bait Management via Settings -> Game management -> Bait sites. There you see the list of your barrels and feeders, the amount of bait in them and the status (active / inactive / penalty). Each bait site comes with coordinates and the location map, so you can easily tell which one is which. Moving the mouse over the coordinates will display the map. |
||
| + | |||
| + | [[File:feeder_location_map.png]] |
||
| + | |||
| + | You can fill your bait site using the bait from your inventory. Select the wanted amount in the feeder in the upper right corner. Using this feature costs [[em$]] / [[gm$]]. There are discounted packs of 25, 50 and 100 refills that you can find under [https://www.thehunter.com/#store/46 Services] in the store. |
||
| + | |||
| + | [[file:bait_site_refill.png]] |
||
| + | |||
| + | You need to have bait in your inventory to be able to use this feature. |
||
== Baiting Videos == |
== Baiting Videos == |
||
{| |
{| |
||
| − | | [[File:TheHunter |
+ | | [[File:TheHunter ★ New Baiting ★ BROWN BEARS - Comparison to the Golden Days of Baiting|300px]] |
| + | | [[File:TheHunter ★ New Baiting ★ BLACK BEARS - Comparison to the Golden Days of Baiting|300px]] |
||
| ⚫ | |||
| + | | [[File:TheHunter ★ New Baiting ★ WILD BOARS - Comparison to the Golden Days of Baiting|300px]] |
||
| + | | [[File:TheHunter ★ New Baiting ★ FERAL HOGS - Comparison to the Golden Days of Baiting|300px]] |
||
|- |
|- |
||
| − | | [[File: |
+ | | [[File:Redfeather Falls Barrel Hunt Uncut theHunter Classic 2017|300px]] |
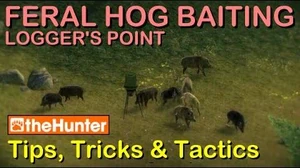
| + | | [[File:TheHunter Tips, Tricks & Tactics - FERAL HOG BAITING|300px]] |
||
|- |
|- |
||
| − | | [[File:TheHunter Let's Hunt |
+ | | [[File:TheHunter Let's Hunt BLACK BEAR|300px]] |
| + | | [[File:TheHunter Let's Hunt BROWN BEAR (big bear 28.1 included)|300px]] |
||
|} |
|} |
||
Revision as of 14:02, 13 April 2019
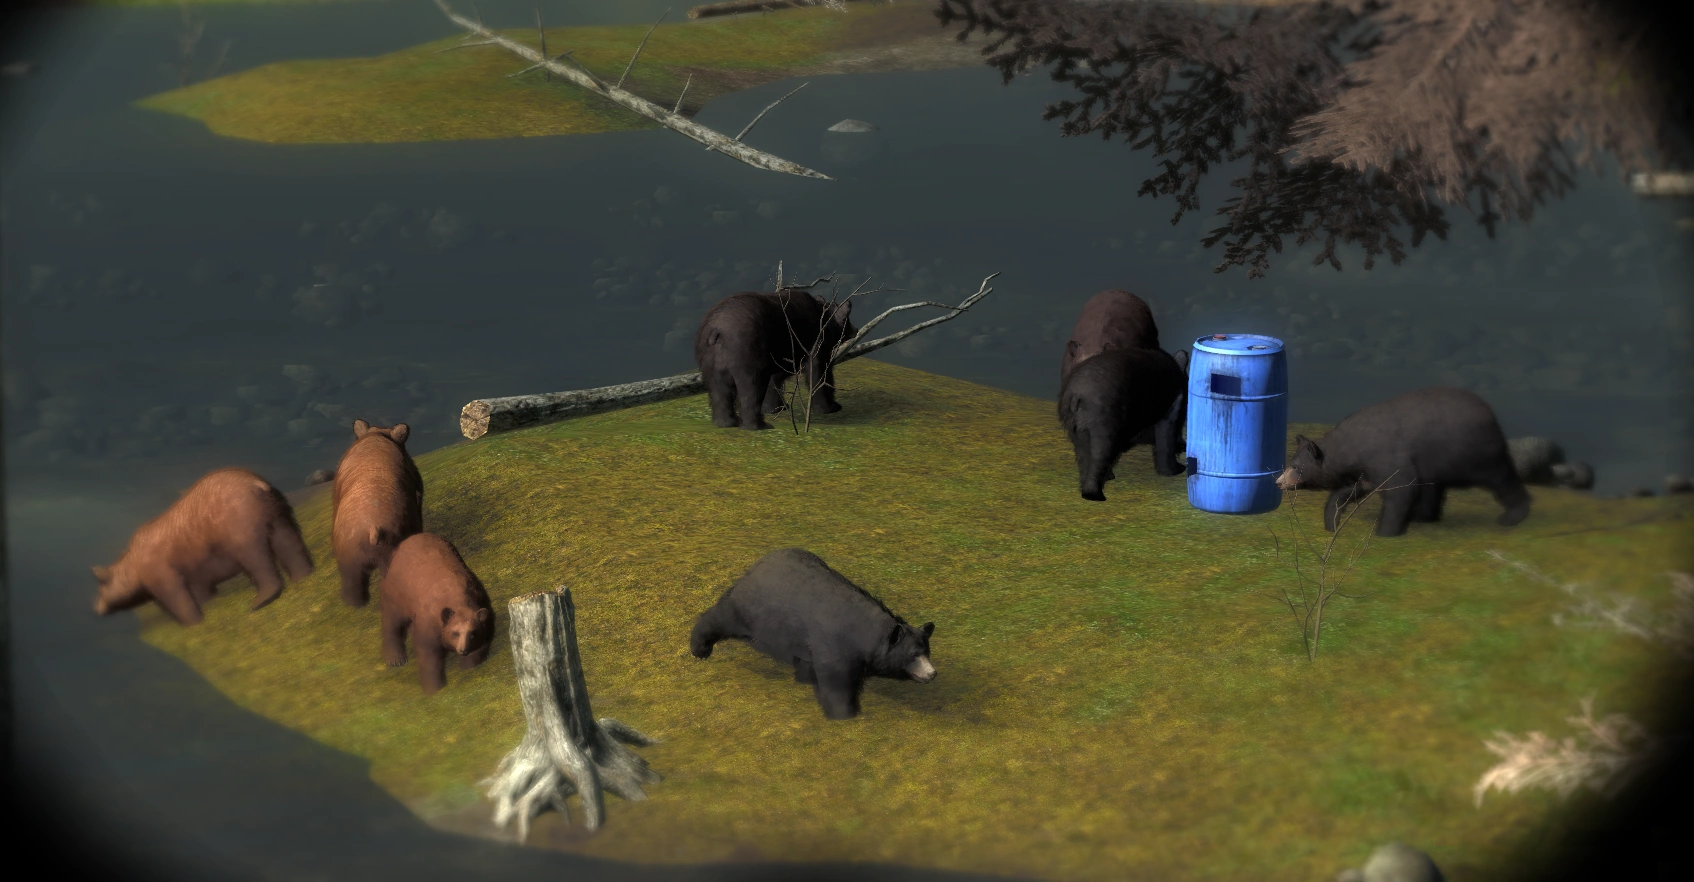
Baiting is used to attract a large number of animals to an area over a long period of time. In order to bait the player needs to acquire a bait container (persistent item) and fill it with bait (consumable item).
Simplification (Baiting 2.0)
The baiting system Was overhauled on March 30, 2017 to simplify the process. A developers note:
One of the objectives when setting out to rework the baiting system was to simplify it. Not only to make the experience for the players more consistent and hopefully more enjoyable, but to make the system easier to debug, maintain, and further develop in the future. To simplify the system, some important decisions were made which have changed how baiting works now. We understand that some players may have preferred a more complex system which had a lot of unknown variables resulting in unpredictable behavior, but it is our hope that the new system will offer better value without removing all of the challenge from baiting.
Attraction
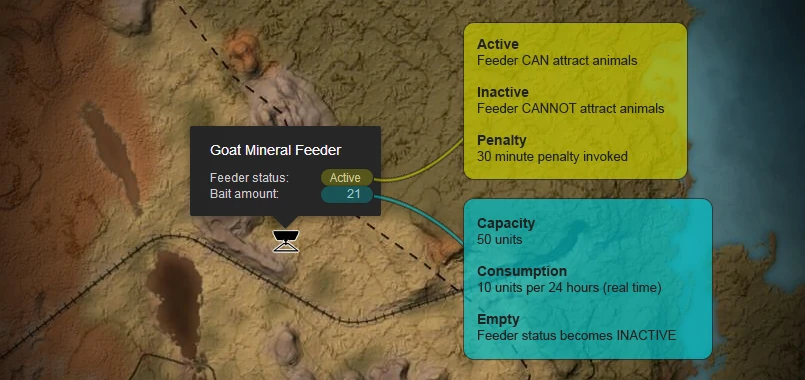
Attraction used to rely on the location of the container and would slowly grow or lower over time when food was available or depleted. The new system no longer has any concept of attraction, formerly a number between 0 and 100. A feeder now has a status, and this can either be “active”, “inactive”, or “penalty”.
- Active: The feeder contains bait and is capable of baiting species.
- Inactive: The feeder may or may not contain bait but is incapable of baiting species.
- Penalty: The feeder is currently disabled because a baited animal was shot at the site.
Bait
Bait is a consumable item that attracts animals when put in a bait container. Bait is consumed by animals visiting the bait container. The rate of consumption is constant at 10 units per day no matter where the container is placed.
- You can put up to 50 units of food into the container. A full feeder will run out of bait exactly 5 days after being topped up.
- Without food, the container will not attract animals.
- Food will be consumed whether or not you play the game.
- Once the container has run out of bait, the container will turn inactive.
Usage
When you place a new feeder in a reserve and add some bait to it, the initial status of the feeder will be inactive, for a period of 4 hours (real time). During this time, the feeder will not attract any animals. After the 4 hour warm-up period, the status of the feeder will change to active and two things will happen. The bait will start to deplete, and the feeder will be capable of attracting animals.
If you let a feeder run out of bait, the next time you add bait the 4 hour warm-up period will restart. This can be avoided by having some bait in the feeder at all times. Topping up a feeder which already contains bait does not restart the warm-up period. A feeder with any bait in it will always remain active and capable of attracting animals.
Shooting Penalty
If you shoot a baited animal near a feeder, the attraction range is reduced to minimum. The range then slowly expands until it reaches its maximum again. This takes 30 minutes. During this time the feeder is still fully attracting animals within the range. The status of the feeder will change to "Penalty".
The penalty cannot be circumvented by ending the current hunt and starting a new one. In a multiplayer game, only the host can invoke the penalty by shooting a baited animal at a feeder. All the other players can shoot as many animals near the host's feeders without causing a penalty.
The shooting penalty only applies if the animal that was shot had been attracted by the container. For instance, shooting a Black Bear near a Bear Bait Barrel will trigger the penalty, whereas shooting a Moose in the same area will not. Also if that bear is no longer attracted and walks away, shooting it will not result in a penalty.
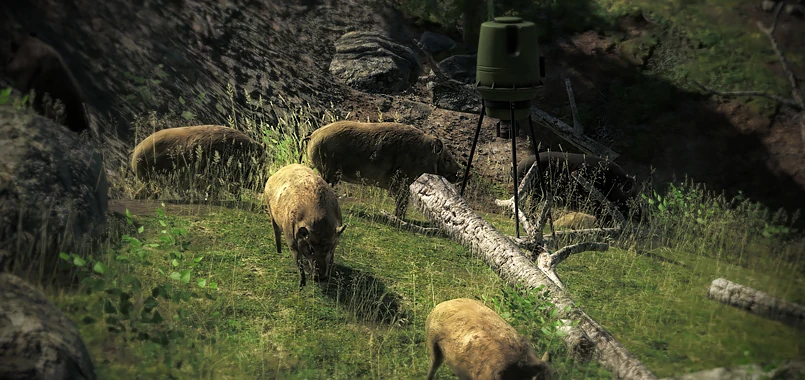
Choosing Locations
The location of your feeder matters. Choose an area where you find many animals of the species you intend to bait. The feeder will attract animals like any other lure. The more animals there are in an area, the better your chances and the bigger your number of baited animals near the baiting station. If you attempt to place a feeder in a location where the corresponding animal does not exist, you will not be able to and will receive an according message.
Some locations will generate better results than others. This is when it becomes important to discuss locations with hunting buddies and fellow community members. If you place a feeder in the same location as your hunting buddy, you should see pretty similar results in most hunts. There will always be variations in activity due to the random nature of the spawning system, but in general results should be predictable.
Moving Containers
Bait containers can be moved during a hunt using the environment interaction menu (default key: E). If the container contains bait when picked up, the bait remains stored in it until the container is once again placed in the world. Bait does not decrease when the feeder is not placed anywhere on a map.
Reserve Limits
A maximum of 4 bait sites can be placed in each reserve. This includes all types; goat mineral feeders, bear bait barrels and hog feeders. For example, you can have 2 goat mineral feeders and 2 hog feeders in Bushrangers Run, but not more of any type.
Equipment
| Feeder | Bait | Attracts | ||
|---|---|---|---|---|
| Bear Bait Barrel |
|
Bear Bait | 
|
 
|
| Hog Feeder | 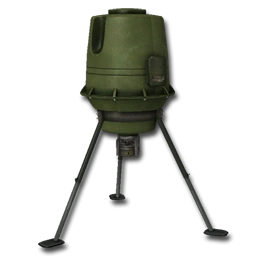
|
Hog Bait | 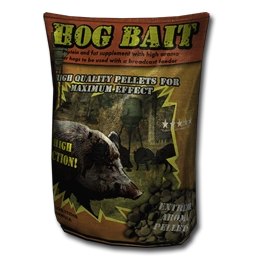
|
 
|
| Goat Mineral Feeder | 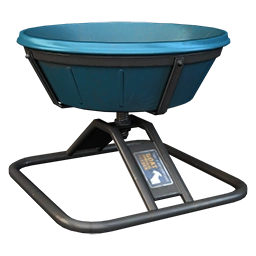
|
Mineral Block | 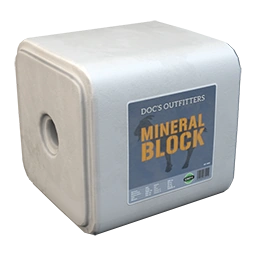
|

|
Bait Containers can be bought in the store in Large Equipment - Bait Sites section, or in the Bundles section as a package with bait. Buy equipment or check out the bundles.
Bait can be bought in the store in Lures - Bait section, or in the Bundles section as a package with bait containers. Buy bait or check out the bundles.
Numbers and Facts
- There is a 4 hours wait time after adding feed before a feeder becomes active.
- A 30 minutes penalty applies when a baited animal is shot at.
- The maximum attraction radius is 150m for Feral Goats and 250m for hogs and bears.
- The minimal possible distance of a feeder to lodges/campsites/ tents is 400m, to other feeders 500m.
- Food depletion is constant at 10 units per day.
- Feeder warm-up, food depletion and penalty recovery all happens whether you play the game or not.
- There is a maximum of 4 feeders total that can be placed in a reserve.
- At the start of the game additional animals spawn around the feeder that contains feed.
- Feeders cannot be placed if no attracted species exist in the reserve.
- Moving a feeder causes another 4 hour wait time until it becomes active again.
- When moving a feeder during a hunting session, it will spook the surrounding animals when removing and placing, however will stay active after being placed again.
- Animals will again come to the feeder within the same session.
- The attraction ends only after leaving the game.
- It will then again take the usual 4 hours warm-up.
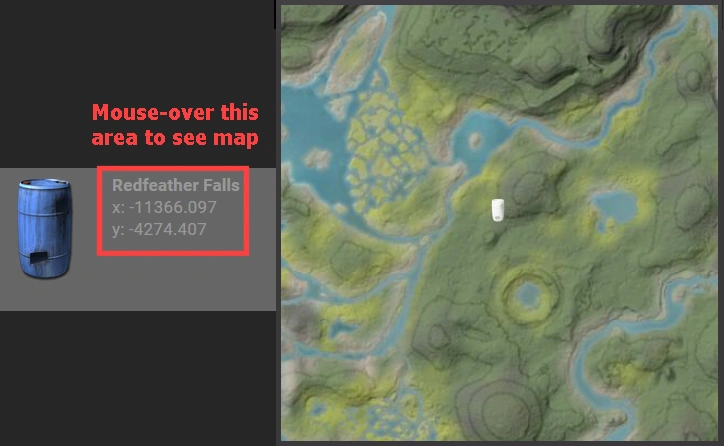
Management from the Website

You can access the Bait Management via Settings -> Game management -> Bait sites. There you see the list of your barrels and feeders, the amount of bait in them and the status (active / inactive / penalty). Each bait site comes with coordinates and the location map, so you can easily tell which one is which. Moving the mouse over the coordinates will display the map.
You can fill your bait site using the bait from your inventory. Select the wanted amount in the feeder in the upper right corner. Using this feature costs em$ / gm$. There are discounted packs of 25, 50 and 100 refills that you can find under Services in the store.
You need to have bait in your inventory to be able to use this feature.
Baiting Videos

|
|

|

|

|
|

|

|